From 1 piece to mass production, our one-stop custom services ensure a worry-free experience for you.
Help Center
Views: 222 Author: Loretta Publish Time: 2025-12-23 Origin: Site
Content Menu
● Size and Shape Constraints in CNC Machining
>> Practical Guidelines for Overall Part Geometry
● Material Selection and Machinability
>> Typical CNC Materials and Their Uses
● Wall Thickness and Minimum Feature Size
>> Recommended Wall and Feature Rules
● Tool Access and Setup Considerations
>> Designing for Better Tool Access
>> Practical Treatment of Undercuts
● Tolerances and Surface Finish
>> Practical Tolerance and Finish Guidelines
>> Simple Ways to Control CNC Cost
● DFM Workflow for Overseas OEM Projects
>> Recommended Five-Step DFM Process
● Real-World CNC Design Scenarios
>> Typical Issue and Solution Patterns
● Take the Next Step With a Professional CNC OEM Partner
● FAQs About CNC Machining Design Limitations
>> Q1: How can I tell if my CNC part design is too complex to machine?
>> Q2: What is a reasonable minimum wall thickness for CNC parts?
>> Q3: Is five-axis machining always necessary for complex shapes?
>> Q4: How should I decide which dimensions need tight tolerances?
>> Q5: Can I use CNC machining for projects that combine metal, plastic, and silicone components?
Designing for CNC machining requires understanding real-world limitations in machine size, material behavior, cutting tools, and tolerances so that parts can be produced consistently and economically for OEM applications. This guide focuses on helping overseas brand owners, wholesalers, and manufacturers create designs that can move smoothly from prototype to mass production with a professional Chinese OEM partner.[1]

CNC machines have a limited work envelope, which defines the maximum part size that can be clamped and machined safely in a single setup. Parts that exceed this range may require multiple setups or segmentation into several components, which increases alignment risk and cost.[1]
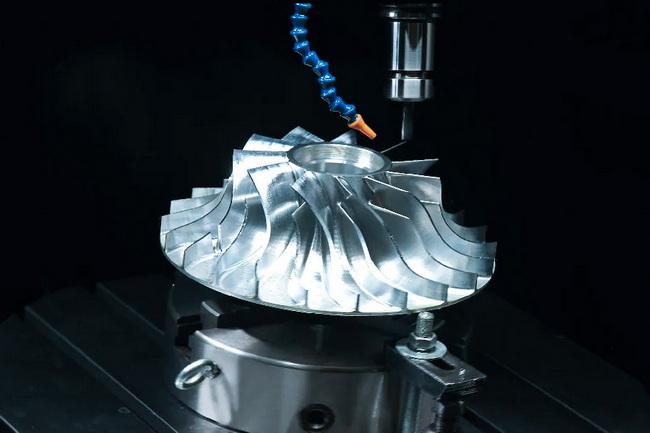
Complex shapes such as deep cavities, narrow channels, and tall thin ribs are more challenging because tools become less rigid and chip evacuation is harder. Designs that ignore these physical limits often lead to vibration, poor accuracy, and long cycle times.[1]
- Keep part dimensions within the common travel range of standard machining centers whenever possible.
- Avoid extremely deep pockets by reducing depth or opening up the geometry for better chip evacuation.
- Consider splitting oversized parts into smaller sections that can be assembled mechanically or welded after machining.
CNC machining can work with metals, plastics, and copper alloys, but each category reacts differently to cutting loads and heat. Hardened steels and heat-resistant alloys often require specialized tooling, low cutting speeds, and more passes, which significantly extend machining time and cost.[1]
Soft plastics and low-melting polymers are easier to cut but can deform, melt, or produce heavy burrs if feeds, speeds, or tool geometry are not chosen carefully. Matching material with the right process parameters is essential for stable quality and repeatability.[1]
- Aluminum alloys: Good machinability, light weight, and suitable strength for housings, brackets, and structural frames.
- Stainless steels: Corrosion resistance with higher cutting forces, commonly used in food, medical, and marine environments.
- Carbon steels: Balanced cost and strength, suitable for shafts, gears, and mechanical components.
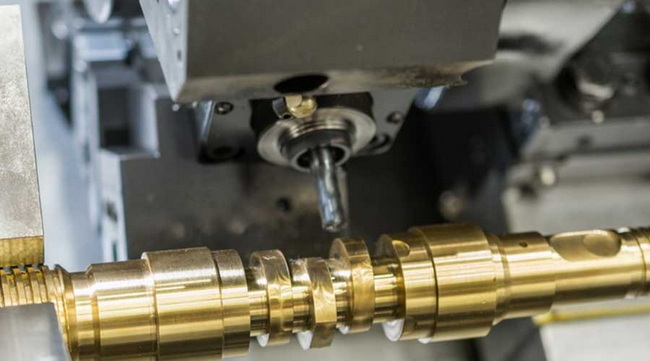
- Copper and brass: Excellent conductivity and machinability, widely used for terminals, connectors, and electrical hardware.
- Engineering plastics: Useful for insulation and lightweight parts, but require careful fixturing and cutting control.
While CNC machining can create detailed features, very thin walls and extremely small features are prone to deflection, vibration, and breakage during cutting. These issues lead to dimensional errors, damaged surfaces, and higher scrap rates.[1]
Feature size is constrained by tool diameter, tool rigidity, and machine resolution; trying to cut features smaller than the available tools usually results in incomplete or unstable surfaces.[1]
- For metal parts, keep general walls at or above a moderate thickness to avoid chatter and bending during machining.
- For plastic parts, use thicker walls than metals to compensate for lower stiffness and higher flexibility.
- Avoid tiny holes and slots that require micro-tools unless absolutely necessary for function or interface requirements.
Every surface that needs machining must be reachable by a rotating cutting tool approaching from a certain direction. If parts are designed with hidden cavities, obstructed surfaces, or extreme angles, they may require extra setups or long, flexible tools that reduce accuracy.[1]
Multiple setups not only add machining time but also introduce alignment risk between operations, which can affect tight-fit features and critical interfaces.
- Arrange important features so that they can be machined from a small number of main orientations.
- Avoid deep, narrow pockets that can only be accessed through very small openings.
- Use internal fillets and chamfers that match common tool sizes instead of sharp internal corners that cannot be produced by standard end mills.

Standard three-axis CNC machining usually approaches the workpiece from the top or from a limited number of directions, making undercuts and extreme overhangs difficult. To machine these areas, special tools or more advanced multi-axis machines may be needed.[1]
Four-axis and five-axis machining expands the reachable surfaces and can reduce the number of setups, but it generally has higher hourly machine costs and requires more complex programming.[1]
- Evaluate whether undercuts are functionally necessary; many purely cosmetic undercuts can be removed.
- When undercuts are essential, standardize their size and location so that they match common tool profiles.
- Consider splitting the part into separate components that can be joined after machining instead of forcing an extreme one-piece design.
CNC machining is capable of very tight tolerances and high-quality surfaces, but applying extreme tolerances everywhere quickly increases cost and inspection workload. Over-tight tolerances may also highlight minor process variation that is irrelevant to actual function, causing unnecessary rework or rejection.[1]
Surface finish is influenced by material, cutting strategy, tool wear, and the need for secondary operations. Finer finishes usually require more passes and slower feed rates, which directly impact cycle time and pricing.[1]
- Use tighter tolerances only for dimensions that affect sealing, alignment, or assembly fit.
- Apply general tolerances for non-critical surfaces to maintain reasonable machining and inspection effort.
- Reserve very fine surface finishes for visible or functional surfaces where they truly matter.
Many CNC designs are technically feasible but not economical for the intended project volume or target price. Cost is influenced by machine time, tool wear, part complexity, material waste, and inspection requirements.
Common cost drivers include overly deep pockets, unnecessary multi-axis operations, aggressive tolerance profiles, and non-standard materials that require special handling. Aligning technical needs with realistic cost expectations is essential for OEM business success.
- Start with moderate tolerances and only tighten them where function demands it.
- Simplify geometry by reducing unnecessary steps, pockets, and small cosmetic details.
- Minimize the number of setups by grouping features into accessible orientations.
- Choose widely available materials to shorten lead times and reduce procurement cost.
For overseas brands, wholesalers, and manufacturers working with a professional CNC partner, a clear Design for Manufacturing (DFM) workflow helps avoid misunderstandings and delays. A structured process makes it easier to balance design intent, quality, and cost.
A cooperative DFM approach also builds trust, as both sides can see that potential risks are identified early and resolved before large investments in tooling and mass production.
- Step 1 – Concept and initial model: Designers focus on function and product requirements.
- Step 2 – Internal DFM review: The engineering team checks the model against internal design rules for CNC manufacturability.
- Step 3 – Supplier feedback: The CNC supplier reviews files and identifies risk areas, cost drivers, and potential simplifications.
- Step 4 – Design optimization: The customer adjusts geometry, tolerances, and material according to the joint review.
- Step 5 – Prototyping and validation: A small batch verifies performance, assembly, and appearance before scaling up.
Practical examples help clarify how small design decisions can affect machining feasibility, cost, and quality. Reviewing typical issues and solutions gives designers a better sense of what to avoid early in the design stage.
In many projects, modest changes to wall thickness, undercut strategy, or surface requirements are enough to transform a difficult part into a stable, repeatable product.
- Thin structural sections replaced with slightly thicker walls and added fillets for better rigidity.
- Deep pockets redesigned with reduced depth or additional access openings to improve chip removal.
- Complex one-piece shapes divided into multiple parts that are easier to machine and assemble.
If you are a brand owner, wholesaler, or manufacturer planning your next precision part project, this is the right time to turn design ideas into stable, manufacturable products. By sharing your 3D models, 2D drawings, material choices, and expected volumes with a capable CNC OEM partner, you can quickly identify design risks, receive cost-saving suggestions, and move confidently from prototype to mass production. Reach out now to request a detailed DFM review and quotation so that your next CNC machining project is launched on a solid technical and commercial foundation.

1. A design may be too complex or uneconomical if it includes very deep pockets, extremely thin walls, or hidden features that require many setups or special tools.
2. The most reliable way to judge this is to request a DFM review from a machining supplier, who can highlight problematic features and provide practical alternatives.
1. For metal parts, a moderate wall thickness is generally recommended to avoid vibration and distortion during machining.
2. Plastic parts typically need thicker walls than metals to maintain stability, and exact values should be confirmed with the supplier based on material and part size.
1. Five-axis machining is useful for highly complex geometries and for reducing setups, but it is not always required for every challenging part.
2. Many shapes can be simplified or split into multiple pieces so that three-axis or four-axis machining remains sufficient and more cost-effective.
1. Tight tolerances should be reserved for features that affect assembly fit, sealing, alignment, or functional performance.
2. Non-critical surfaces, purely cosmetic faces, or oversize clearance areas can use more relaxed tolerances to control machining and inspection cost.
1. CNC machining is suitable for many metal and plastic components and can be used alongside other processes for silicone and stamped parts.
2. For mixed-material projects, it is important to coordinate material selection, tolerances, and assembly methods early in the design stage to avoid mismatched fits and unnecessary rework.